The following are the steps to set up a simple invoicing application in FilmMaker
Step 1: Software installation:
We need to install a developer version of FileMaker on our computer. Multiple developer versions, such as FileMaker Pro 16, are available in the market. The latest version available is FileMaker Pro 17.
Advanced versions provide much more features to develop an application.
Step 2: Open and create a new solution:
We need to open the software and create a new solution located in the File menu.
Step 3: Creation of database:
Creation of table & Creation of field
We need to create tables as per our requirements. For instance, product, purchase, client and purchase detail etc.
We need to go to the File menu, click on Manage and Database.
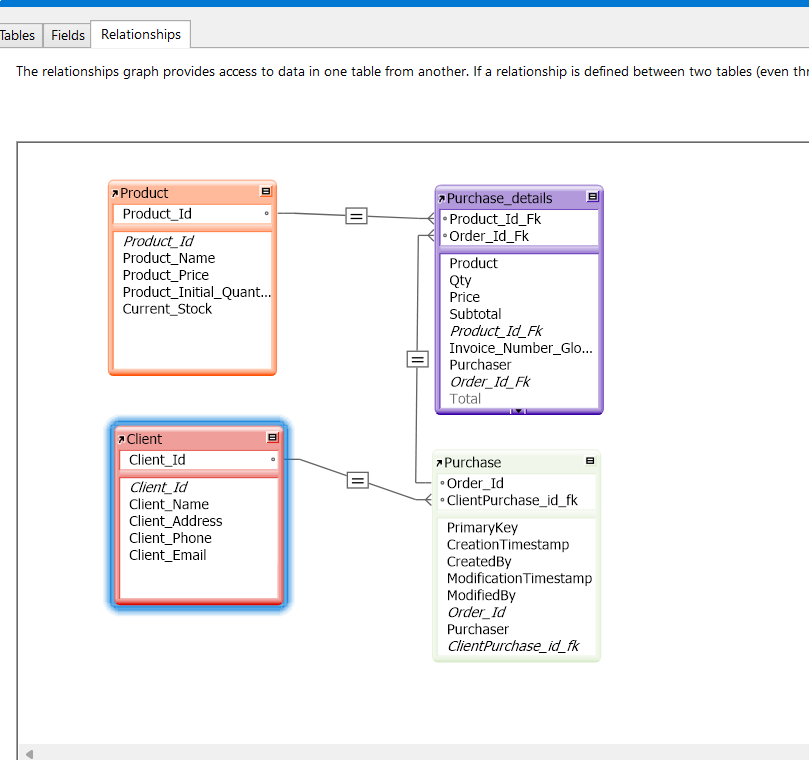
This opens up a window with three tabs i.e. Tables, Fields, and Relationships
We need to create a table by clicking on Tables tab.
Also as per our requirements, we would need to create the desired fields and set up a relationship between the tables.
In case of invoicing application, in the product table, product id, product name and product price, product initial quantity and the current stock would be the fields for the product table.
Likewise, client id, client name, client address would be fielded for client table.
Order_id, Purchaser, ClientPurchase_id_fk would be fielded for purchase table.
The product, qty, price, subtotal, invoice no. (Global field), client_id_fk, Purchaser would be fields of Purchase details table.
Depending upon the requirement, we can create or change the field type of tables.
For e.g. – date, number, text field etc. However, field changes could lead to data losses and could be avoided. For instance, in an invoicing application date field is created for purchase table.
As per our requirement, we can specify a field to be unique, auto increment, creation date, etc.
Invoice number needs to be created as a global field in our application.
We can click on the Fields tab to create fields for respective tables.
Creating relationships
On the Relationships tab in the GUI, we will get the option to create relationships between tables by just relating the primary key and foreign key between tables.
Step 4: Design a Layout:
Layouts will be created automatically based on the tables created. However, we can create multiple layouts of the same tables and pick fields and design them as per our requirement.
We have an option named inspector (view-tab-inspector) which will allow us to design each field in the layout.C lick the field where you want some modifications to be done.
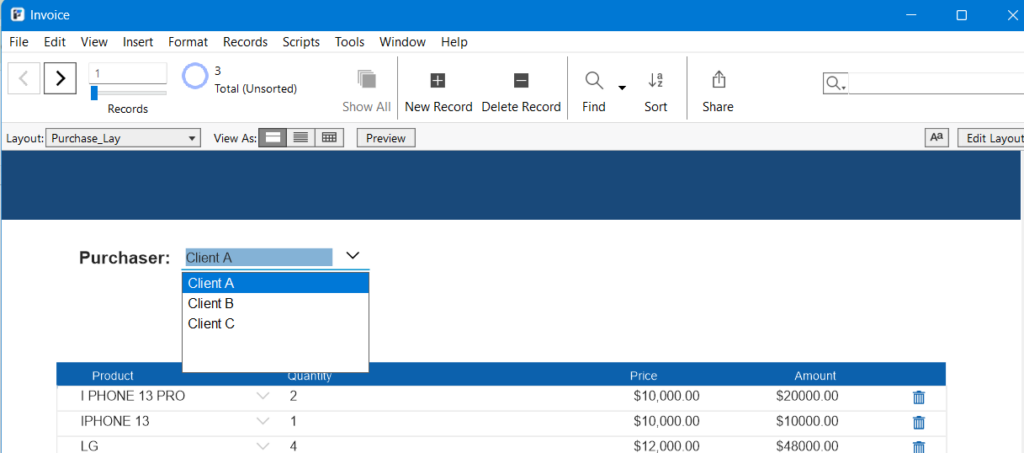
For instance, in an invoicing application, a drop-down list can be created for purchase layout of purchase table for product field. The values are fetched from product table as there exists a relationship between purchase_details and product table previously.
Portals: For an invoicing application, we need to create portals to input records to a table from a layout of the different table.
For instance, we need to import fields from purchase details table to the portal of purchase layout. Therefore the portal will contain fields such as product list, Quantity, price, subtotal. Using this portal we need to input records which will be stored in the purchase details table.
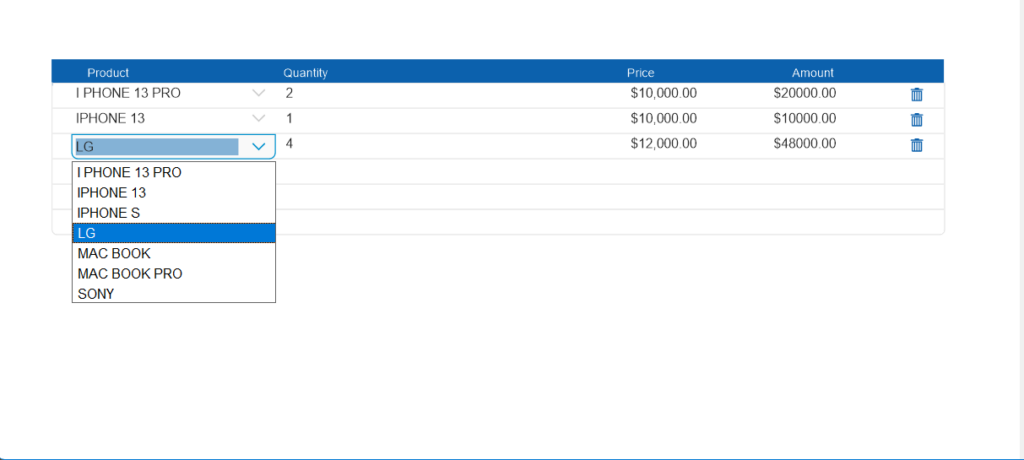
In purchase layout, we also need to place purchaser field and create a drop-down list of client names from client table. Check out the snapshot below
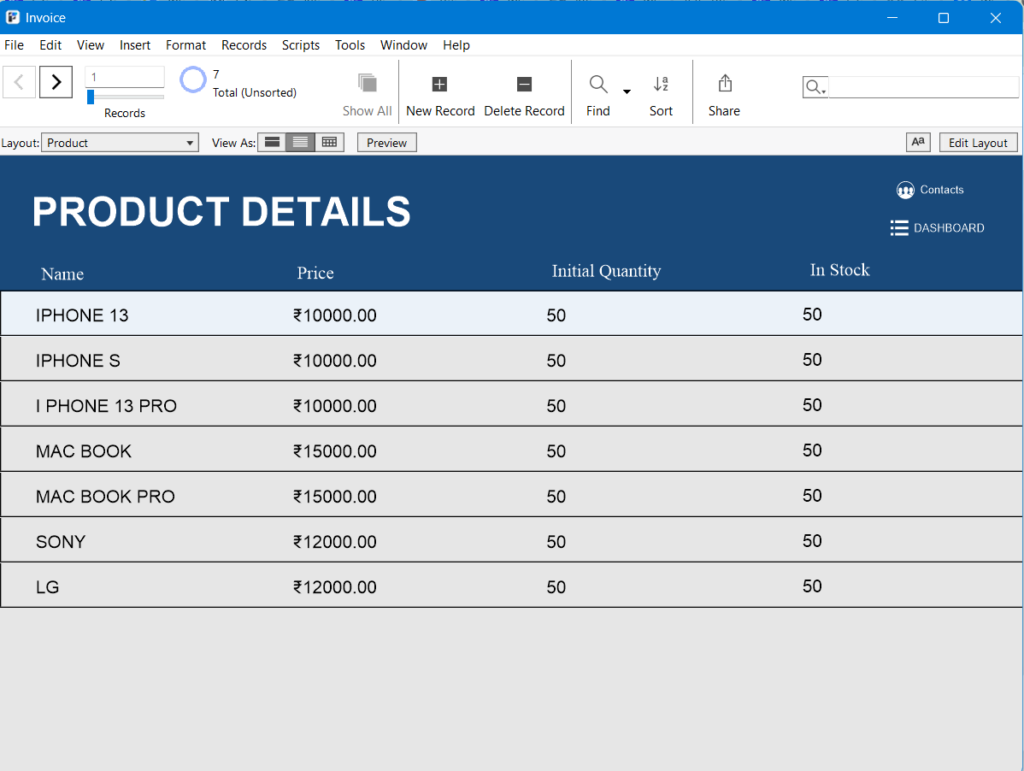
Similarly, there could be a layout based on product table for displaying and storing product information such as product name, cost, quantity, in stock
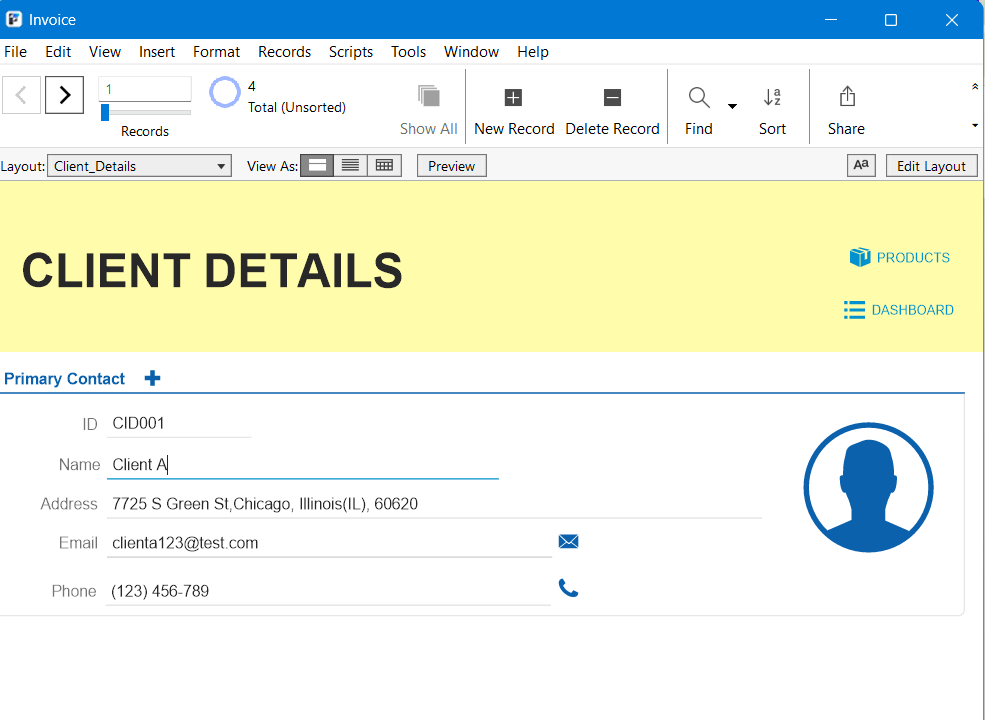
The following layout is designed for client table where a client can enter his details such as customer id, Name, Mobile No, Address.
Invoice generation :
Invoice is a layout of purchase details table.
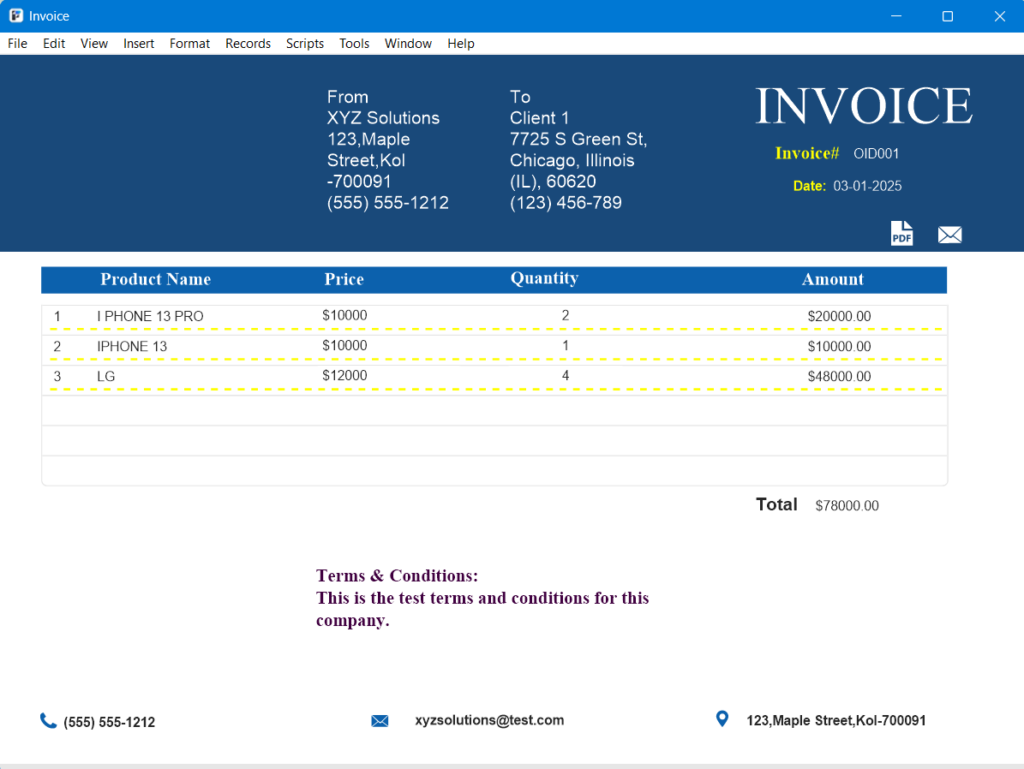
There is a button for generating an invoice located in the purchase layout. A script is written (script Name: Invoice ) against this button which will contain steps to navigate to an invoice layout where an invoice is generated.
Step 5: Creation of scripts: Script is created to exclusively to execute specific instructions with the help of script steps provided by the FileMaker software.
A Script needs to written to update the availability of a product after the purchase of the product.
Based on the product id, the script will execute an SQL query which will fetch the quantity of product purchased from the purchase layout. The script will then deduct the fetched quantity from the initial stock field of the product table.
The Script Name would be Stock
The script would be as follows :
[sourcecode language=”js”]
Set field [Product : : IN_STOCK;Product :: Quantity – ExecuteSQL(“select qty from Purchase_details where product_id_fk=?”;””;””; product::Product_id )[/sourcecode]
Similarly, a script for generating an invoice in the purchase layout would be as follows
The Script Name would be Invoice
[sourcecode language=”js”]
Set Variable [$Order_id; Value: Purchase::Order_Id]
Go to layout [“Invoice”(Purchase_details);Animation:None ]
Perform Find[Restore]
Set Field [Purchase_details::invoice_number_global;$Order_id][/sourcecode]
A script also needs to be written to fetch the details of the purchaser by using the client id of purchase table (Client_id_fk).
The Script Name would be Purchase
[sourcecode language=”js”]
Set Variable [$Client_id;Value:Purchase:Purchaser]
Set Field [Purchase::Client_id_fk; $Client_id][/sourcecode]

